
MPPT technology optimizes energy harvest from solar panels by tracking the maximum power point, ensuring efficient battery charging and higher energy yield compared to PWM controllers.
1.1 What is an MPPT Solar Charge Controller?
An MPPT (Maximum Power Point Tracking) solar charge controller is a device that optimizes energy harvesting from solar panels by continuously tracking the panel’s maximum power point. It efficiently converts solar energy to battery power, ensuring higher energy yield compared to traditional PWM controllers. This advanced technology adjusts the system’s voltage and current to maximize energy output, especially under varying weather conditions, making it a critical component in solar power systems.
1.2 Advantages of MPPT over PWM Controllers
MPPT controllers offer significant advantages over PWM controllers, primarily in energy efficiency and performance. MPPT technology can increase energy output by up to 30% compared to PWM systems by continuously adjusting to the solar panel’s maximum power point. This results in faster charging and better utilization of available sunlight, especially in varying weather conditions. Additionally, MPPT controllers support higher voltage solar panels and provide more precise charging, ensuring optimal battery health and longevity.

Safety Precautions and Installation Requirements
Ensure all safety guidelines are followed, including disconnecting batteries and panels before installation. Install circuit breakers and verify battery voltage exceeds 12V for proper controller operation.
2.1 Essential Safety Measures Before Installation
Always disconnect batteries, loads, and solar panels before starting installation. Ensure the battery voltage exceeds 12V for proper controller boot-up. Install air circuit breakers between the controller and PV modules to protect against overcurrent. Read all instructions and warnings carefully in the manual before proceeding. Turn off any connections to prevent electrical shocks or system damage. Properly ground the system to ensure safety and efficiency during operation.
2.2 Recommended Electrical Connections and Protections
Install air circuit breakers between the controller and PV modules to protect against overcurrent. Ensure appropriate fuses are in place for added safety. Properly ground the system to prevent electrical hazards. Connect batteries, loads, and solar panels according to the manual’s wiring diagram. Use protective devices to safeguard against voltage spikes and surges. Always disconnect components before installation or maintenance to avoid electrical shocks. Follow the manufacturer’s guidelines for secure and efficient connections.
Installation and Configuration of the MPPT Controller
Mount the controller in a well-ventilated area, connect solar panels, battery, and load according to the manual. Configure settings like battery type and charging parameters for optimal performance.
3.1 Step-by-Step Installation Guide
Mount the controller in a well-ventilated area. Disconnect all components before installation. Connect the battery first, followed by solar panels and load. Ensure polarity is correct. Set battery type and charging parameters via the display or software. Enable MPPT tracking algorithm for optimal performance. Secure all connections tightly. Turn on the system and test functionality. Monitor performance through the display or remote monitoring software. Refer to the manual for specific wiring diagrams and safety precautions.
3.2 Configuring the Controller for Optimal Performance
Set the battery type, voltage, and charging parameters according to your system requirements. Enable the MPPT tracking algorithm to maximize energy harvesting. Adjust the charging curve settings to match your battery’s specifications. Use the display or remote monitoring software to fine-tune parameters like bulk, absorption, and float charging times. Ensure all settings align with your solar panel and battery configuration for efficient operation. Refer to the manual for detailed instructions on configuring advanced features like temperature compensation and load control.
Understanding the Charging Process and Curve
MPPT controllers optimize energy harvesting by tracking the solar panel’s maximum power point, converting excess voltage to current for efficient battery charging and improving overall system performance.

4.1 How MPPT Controllers Optimize Energy Harvesting
MPPT controllers optimize energy harvesting by dynamically adjusting to the solar panel’s maximum power point, ensuring maximum energy transfer to the battery. Unlike PWM controllers, MPPT technology converts excess voltage into usable current, significantly increasing energy yield, especially in varying conditions. This advanced tracking algorithm continuously monitors and adapts to the solar panel’s output, maximizing efficiency and ensuring optimal charging performance, even in cloudy or temperature-fluctuating environments.
4.2 Interpreting the Charging Curve
The charging curve illustrates the battery’s charging process, showing voltage and current levels over time. It typically includes phases like fast charging, sustaining, and floating. The curve helps monitor the system’s performance, ensuring the battery is charged efficiently. By analyzing the curve, users can verify if the MPPT controller is operating correctly and identify potential issues. This visualization is crucial for optimizing energy storage and ensuring the solar system functions at its best capacity.

Troubleshooting Common Issues
Identify common issues like error codes or charging problems. Check connections and settings, and refer to the manual for specific solutions to ensure optimal performance and functionality.
5.1 Identifying and Solving Performance Problems
Common issues include error codes, low charging efficiency, or faulty connections. Consult the manual for specific solutions, such as checking wiring, adjusting settings, or resetting the controller. Ensure proper installation and configuration to prevent performance degradation. Regularly monitor the system to detect issues early and maintain optimal functionality. Refer to troubleshooting guides for detailed steps to resolve problems effectively.
5.2 Error Codes and Their Solutions
Error codes like E01 (input overload) or E02 (thermal protection) indicate specific issues. Check connections for E01 and ensure proper cooling for E02. E03 (battery voltage low) requires checking battery connections and voltage levels. E04 (communication error) may need a firmware update or reset. Refer to the manual for detailed solutions and troubleshooting steps. Addressing codes promptly ensures optimal performance and prevents system damage.

Maintenance and Upkeep of the Controller
Regularly clean the controller, check connections, and ensure proper airflow to prevent overheating. Verify settings and update firmware to maintain efficiency and longevity of the system.
6.1 Regular Maintenance Tasks
Regular maintenance ensures optimal performance and longevity of the MPPT controller. Clean the controller surface and vents to prevent dust buildup. Check all electrical connections for tightness and corrosion. Ensure proper airflow around the unit to avoid overheating. Verify battery and solar panel settings are correctly configured. Update the controller firmware periodically to access new features and improvements. Perform these tasks every 3-6 months or as recommended in the manual to maintain efficiency and reliability.
6.2 Ensuring Longevity and Efficiency
To ensure the longevity and efficiency of your MPPT controller, proper installation and care are essential. Protect the unit from extreme temperatures, moisture, and physical stress. Install an air circuit breaker between the controller and solar panels for added safety. Ensure proper ventilation to prevent overheating, which can degrade performance. Regularly update the firmware to optimize functionality. Use a Surge Protection Device (SPD) to safeguard against voltage spikes. Refer to the manual for specific care and storage recommendations to maintain your controller’s performance and extend its lifespan.
Best Practices for Using an MPPT Controller
Selecting the right controller for your system and monitoring its performance regularly ensures optimal energy harvesting. Follow the manual for proper setup and adjustments to maximize efficiency and reliability.
7.1 Selecting the Right Controller for Your System
Selecting the right MPPT controller involves matching its capacity with your solar panel and battery system. Consider factors like maximum power input, battery voltage, and charge current. Ensure the controller’s voltage and current ratings align with your system’s requirements for optimal performance. Refer to the manual for specifications and compatibility guidelines to make an informed decision, ensuring efficient energy harvesting and system reliability over time.
7.2 Monitoring and Optimizing Performance
Regularly monitor the MPPT controller’s performance to ensure optimal energy harvesting. Track key metrics like energy output, charge current, and system voltage. Use the controller’s built-in monitoring features or external tools to analyze performance data. Adjust settings such as charge modes or voltage thresholds to maximize efficiency. Ensure proper alignment with solar panel and battery specifications. Address any performance issues promptly to maintain system reliability and longevity, leveraging the controller’s advanced algorithms for consistent energy output.
References and Further Reading
Consult the official manuals for detailed specifications and advanced configurations. Additional resources include technical guides, datasheets, and manufacturer support for further understanding and troubleshooting.
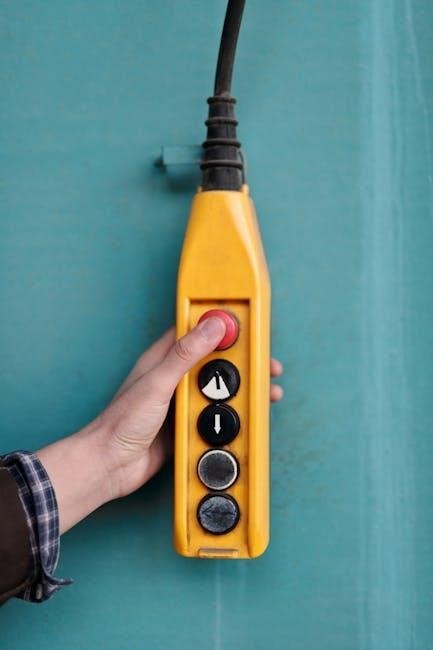
8.1 Key Symbols and Terminology in the Manual
This section explains the essential symbols and terms found in the MPPT solar charge controller manual. Understanding these elements is crucial for safe and effective use of the device. Key symbols include the check mark, indicating correct operation, and the warning sign, highlighting potential hazards. Important terms such as Maximum Power Point Tracking (MPPT), PV input, and battery voltage are defined to ensure proper configuration and monitoring. Refer to the manual’s glossary for detailed explanations of these and other terms.
8.2 Additional Resources for Advanced Users
For advanced users seeking deeper technical insights, this section provides supplementary resources. PDF manuals and installation guides offer detailed schematics and troubleshooting tips. VE.Direct Protocol documentation allows integration with other systems for enhanced monitoring. Additionally, energy storage system guides and pre-RMA test instructions are available for comprehensive diagnostics and maintenance. These resources empower users to optimize their MPPT controller’s performance and resolve complex issues efficiently.